It doesn’t matter if you’re in the corporate world or an academician, in any line of work, a custom Gmail signature is a great touch to your professionalism. Now, if you haven’t been using a signature on Gmail for all these years, it’s time to stop living under a rock and get started. To help you out, we have crafted this detailed guide on how to add or change your Gmail signature like a pro. Let’s begin!
How to Add or Change Gmail Signature on Web
On your desktop, use your desired browser to visit the Gmail web version. Once that’s out of the way, simply follow these steps:
- Firstly, click on the settings cogwheel icon at the top right corner.
- Then, select See all settings from here.
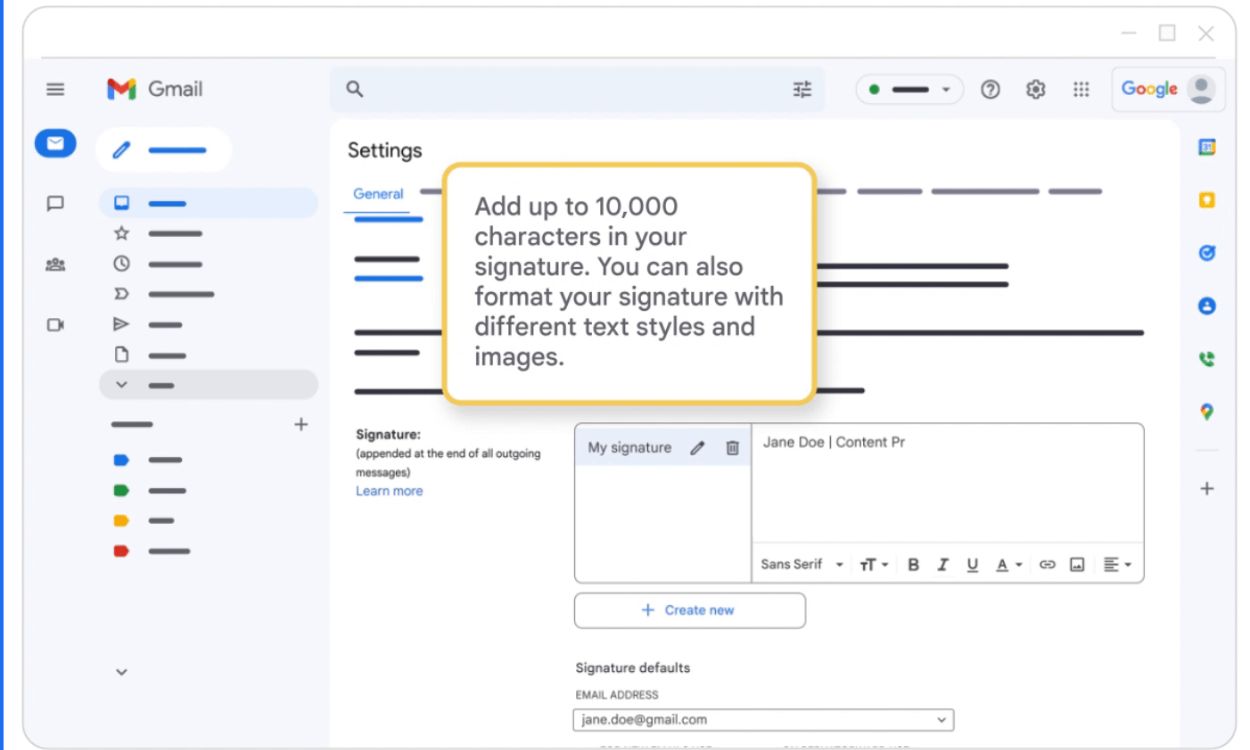
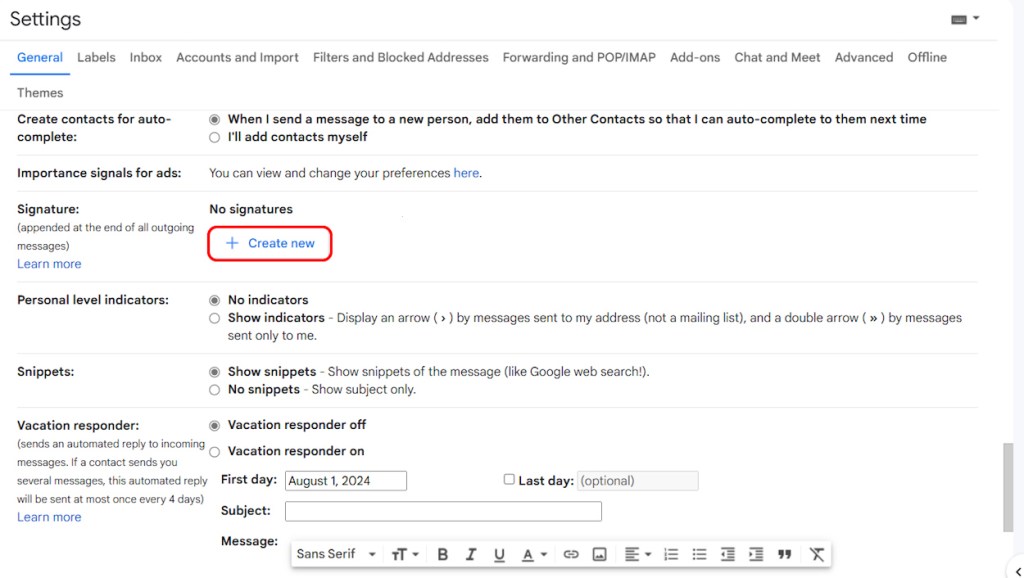
- Next, in the General tab, scroll down to find the Signature panel.
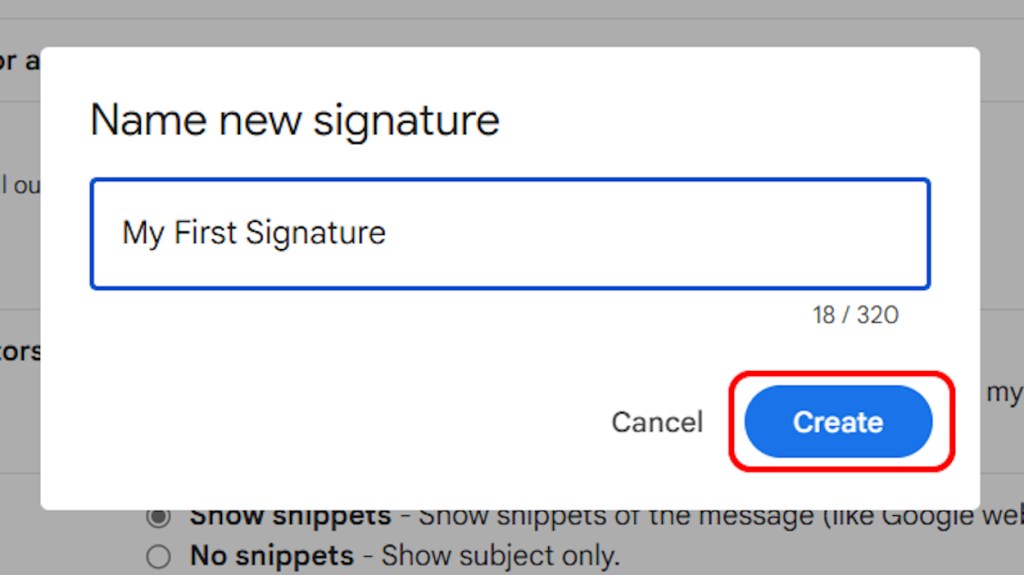
- Here, you can click on the blue Create new button and type in a name for your signature in the pop-up window, after which you will need to tap on Create. Note that this is not your signature. It’s simply to save your signature(s) with specific names for ease of managing them later.
- Once you name a custom signature template like this, a text window will open up, where you will need to create your actual signature.
- Here, you will see a bunch of text formatting tools that you can use to really bring your signature to life. You will also find the option to add images here to further enhance your signature’s aesthetics.
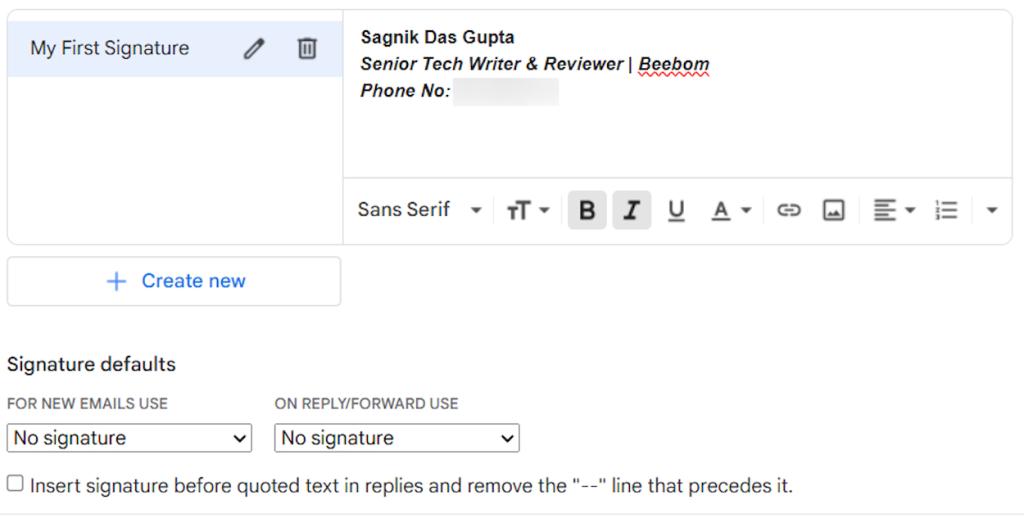
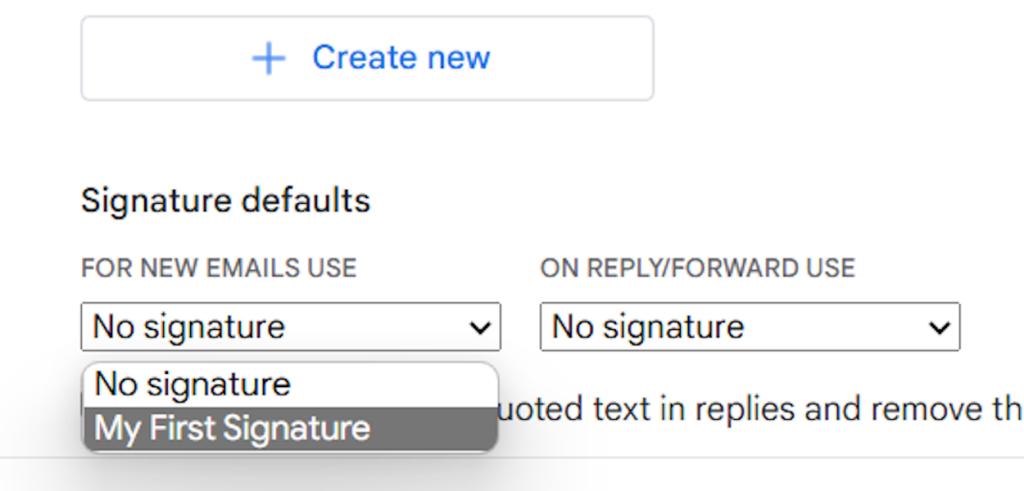
- Then, right underneath, you will see the Signature defaults section. Here, modify the “FOR NEW EMAILS USE” and “ON REPLY/FORWARD USE” settings by clicking on the drop-down menu and selecting your default address. So, you won’t have to constantly select your signature when sending an email, as this will directly fetch the desired signature.
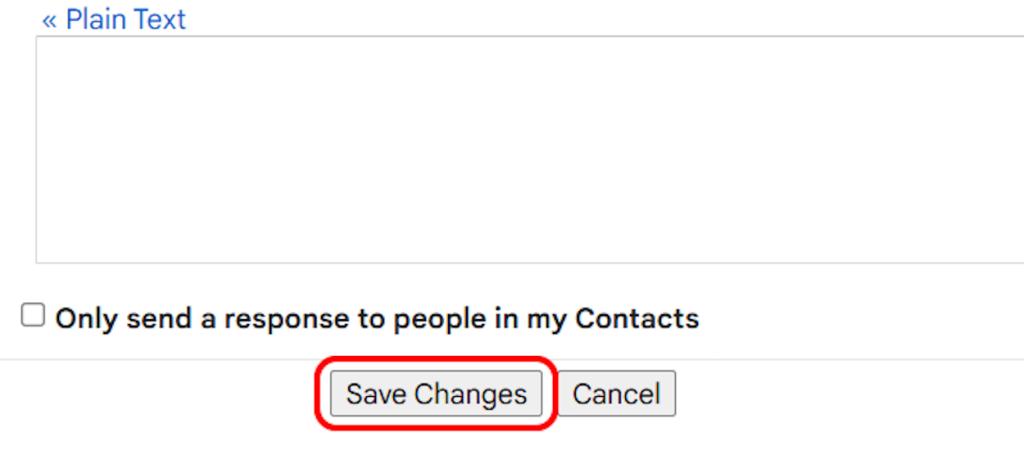
- Once you’re done with the changes, simply scroll down to the very bottom and hit Save Changes.
To change, delete, or create new email signatures, you can simply retrace your steps back to General -> Signature. Here, you will find the icons and options to carry out all those actions.
How to Add or Change Gmail Signature on Android & iOS App
Things are a little different if you mostly use the Gmail mobile app on your Android device or an iPhone. The signatures you create and set on the web will not be fetched when composing an email on the mobile app.
For the mobile app, you will have to set a Mobile Signature separately. The process to do this is slightly different on the Android and iOS mobile apps, thanks to interface-level differences. So, we’ve made different sections for your ease of understanding. Take a look:
On Android
- When using the Android Gmail app, tap on the hamburger menu at the top left.
- Next, scroll down to select Settings and select the Gmail address to which you want to add a mobile signature.
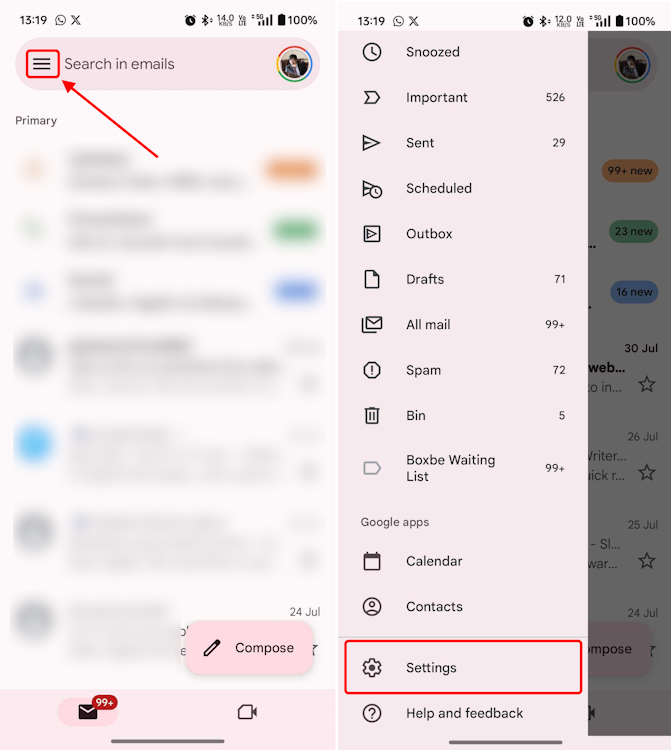
- Then, scroll down to find and tap on the Mobile signature panel and simply type in your signature in the text box that pops up.
- Once done, hit OK and that’s it. The next time you send an email on the Gmail mobile app, this signature should be fetched automatically.
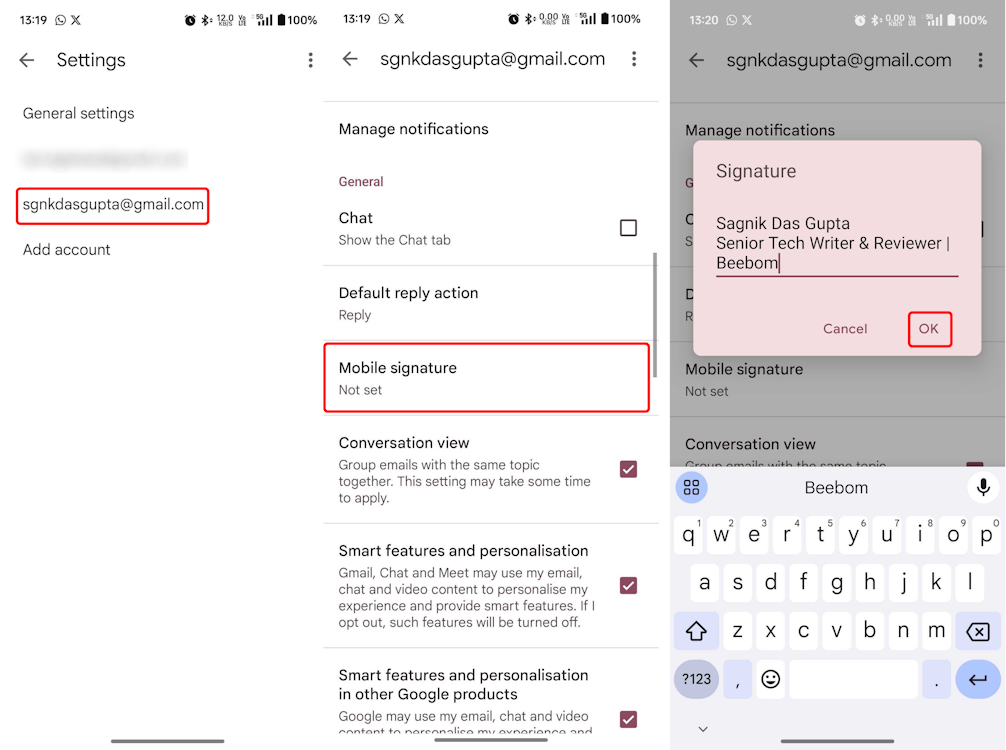
- To edit or make changes to a signature, simply go to the Hamburger menu > Settings> Mobile Signature and tap on the signature to edit it.
On iOS
- Once in the Gmail app for iOS, tap on the hamburger menu at the top left and scroll down to select Settings.
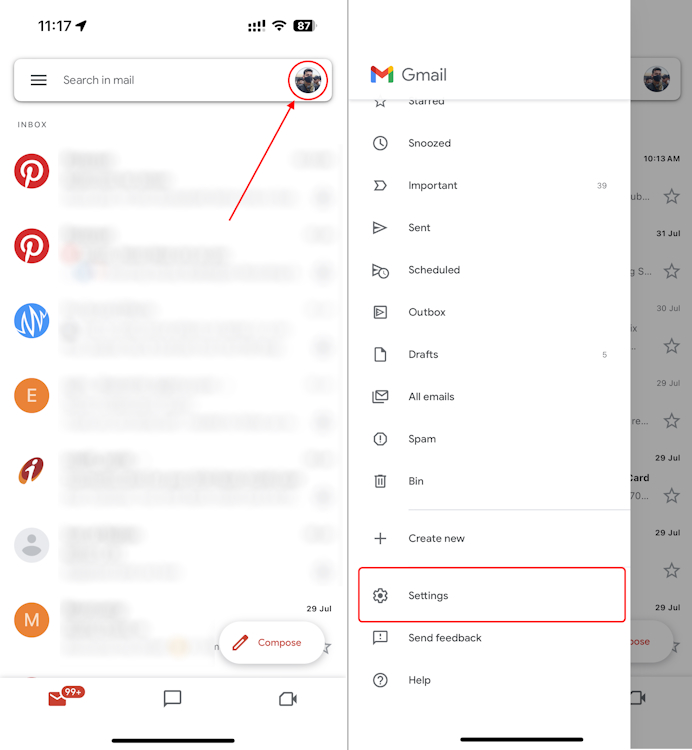
- Next, scroll down to find Signature settings and toggle on Mobile signature.
- A text box will appear, where you’ll need to type in your signature and hit Done at the top right. That’s it.
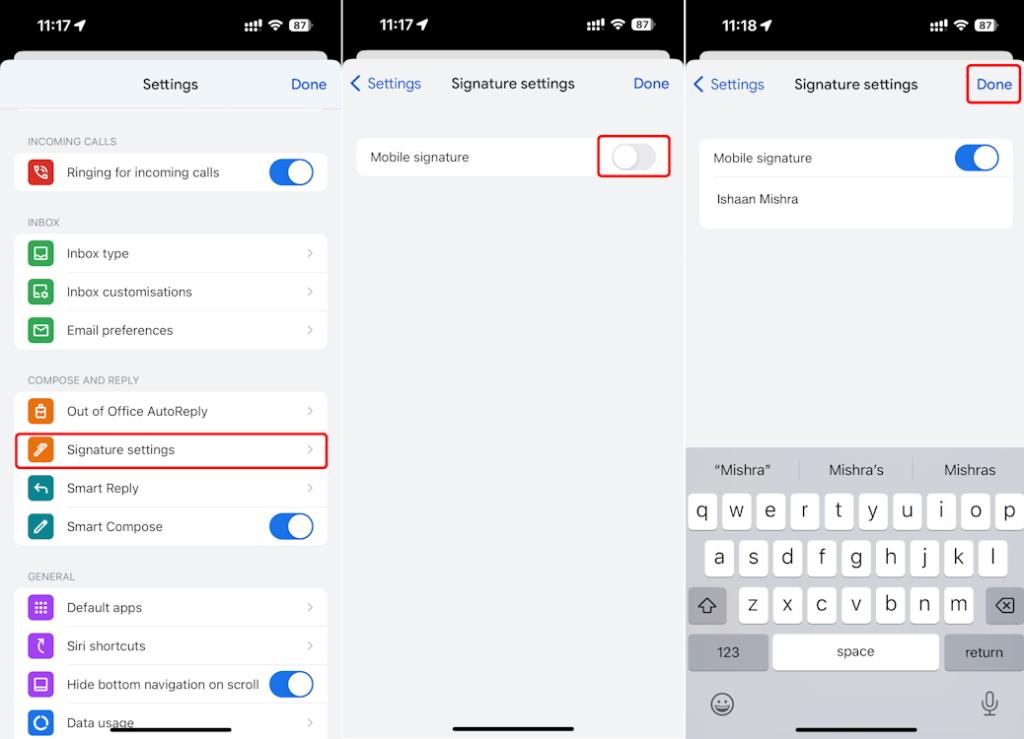
- To edit or make changes to a signature, simply go to Hamburger menu > Settings> Signature settings and tap on the signature to edit it.
Mobile signatures definitely don’t hit the spot nearly as well, for the lack of any customizations. So, the web version is the way to go, for the most part. Also, you can only add a single mobile signature on the Gmail mobile app, which is a bummer.
Also, an important thing to note is that the signature you set on your desktop is not fetched when you compose an email on the Gmail mobile app. The only way to get a signature on the mobile app is by enabling and adding a mobile signature in the first place.
Anyway, that’s about it for this guide. If you have any further queries, drop them in the comments down below and we’ll get right back to you!

