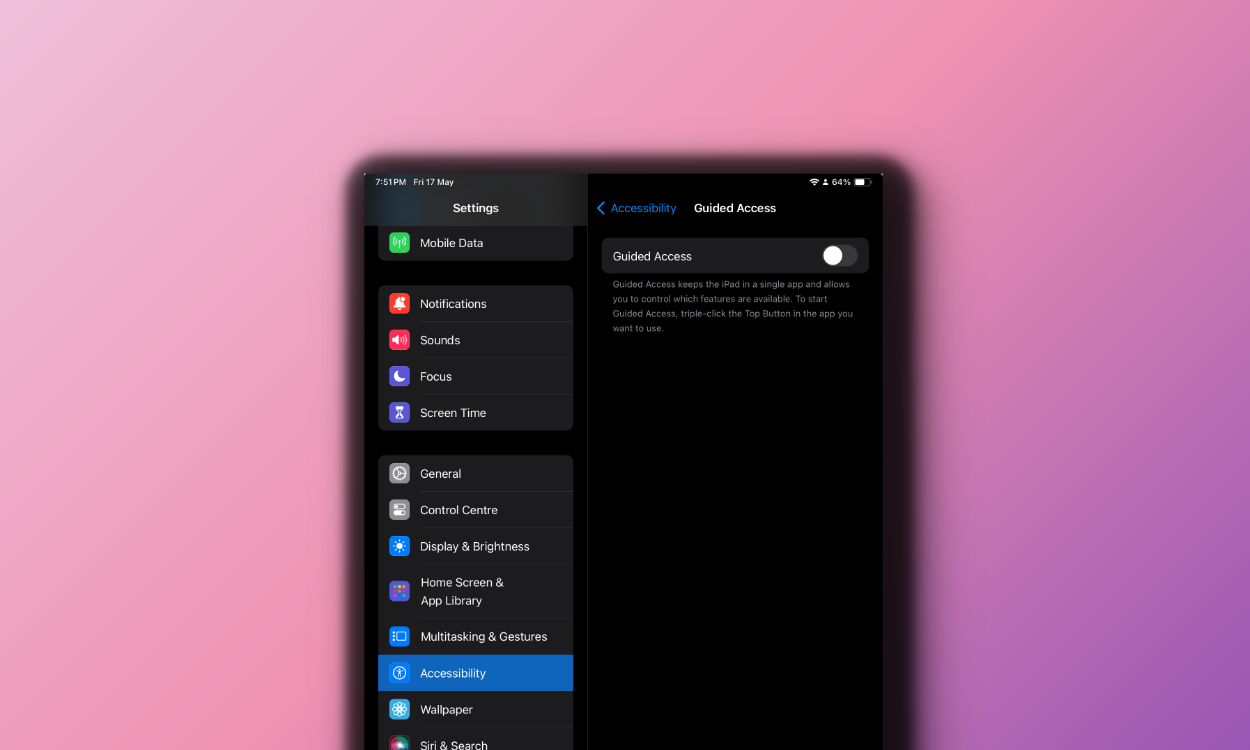
There are several instances when you wish to lock your iPad screen and restrict it to a single app. Sometimes, you may want to ensure that your toddler doesn’t place a call while watching nursery rhymes on your iPad. Or maybe, you want to stay focused on a task without being tempted to shift your attention to social media apps. The Guided Access feature offers great help. It’s a super-useful accessibility feature that limits what you can see and what you can tap on your device. Here’s a complete guide on how to use Guided Access on an iPad.
What is Guided Access
Guided Access is a built-in accessibility feature on iPhones and iPads that allows you to temporarily limit your device to a single app and control which features are available. This feature helps you prevent any accidental gestures and will also allow you to lock the iPad screen for your kids. You can set a time limit, and control which features, areas of the screen, or hardware buttons are accessible. In short, this feature restricts a user to a specific app and locks him out of any other apps.
It’s a great parental control feature to prevent your child from leaving an app or accessing certain features. Also, if you’re obsessed with a specific app and it eats up your precious time, this accessibility feature helps you limit the amount of time spent on an app.
The Guided Access feature is available on all iPhones and iPads running iOS 11 or later.
How to enable Guided Access on iPad
The Guided Access feature is built right into your iPad and iPhones. So, you don’t need to install any third-party app or software. Before you can use Guided Access on your iPad, you have to enable & set it up in Settings. The process is super easy and takes only a few seconds. Let me show you how to do it:
- On your iPad, open the Settings app and navigate to the Accessibility section.
- Now, scroll down to the bottom and tap on Guided Access.
- Here, turn on the Guided Access toggle.
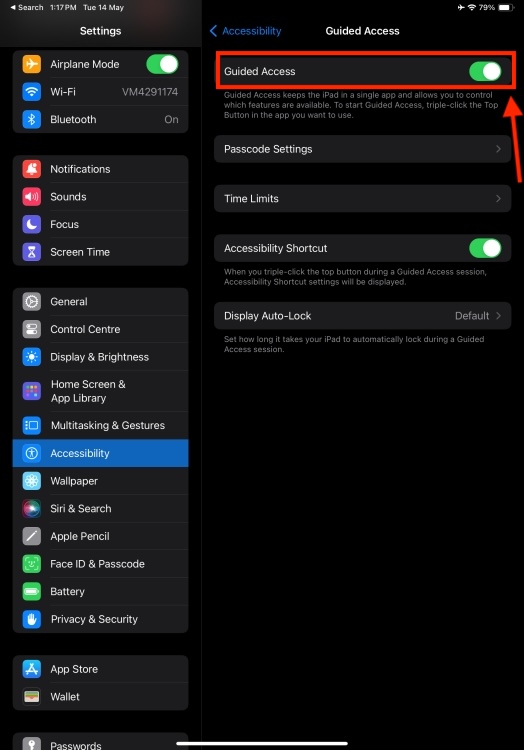
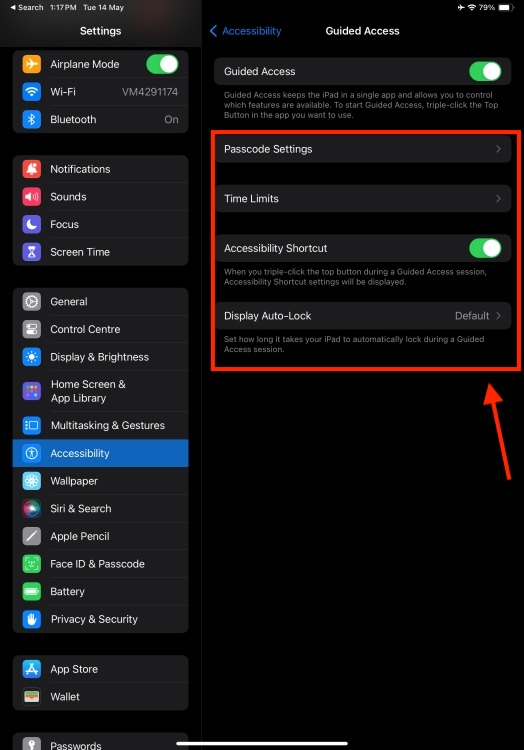
- Now, tap on Passcode Settings and Set Guided Access Passcode.
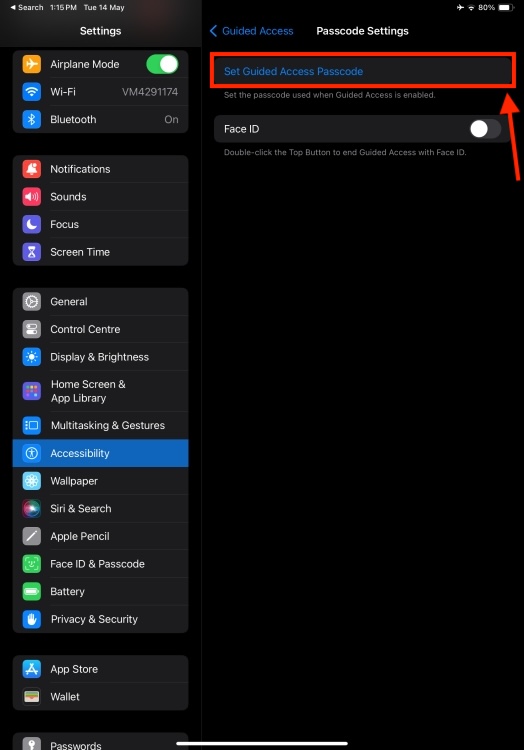
- Choose a passcode, then re-enter it. Make sure the passcode isn’t easy to guess and is different from your iPad’s passcode.
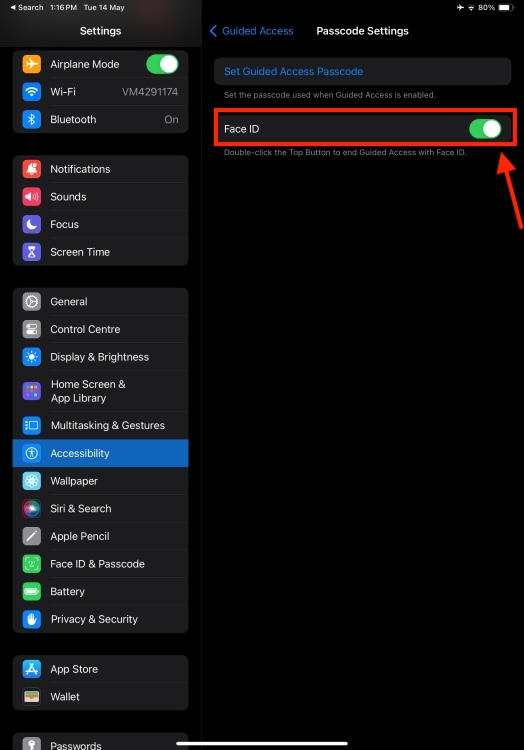
- While you’re here, you can also turn on Face ID or Touch ID to end a Guided Access session.
- You can also make other adjustments like setting Time Limits to allow your iPad to make a sound or speak before the guided session ends.
- If you want to allow the use of the Accessibility Shortcut during the guided session, turn on the Accessibility Shortcut toggle.
- You can tap on the Display Auto-Lock option to set the time after which the iPad automatically locks during a Guided Access session.
How to Start a Guided Access Session on iPad
Once you’ve set up Guided Access on your device, you can use it to child-lock the iPad while watching videos. Here are the steps to start a Guided Access session on your iPad:
- Open the app you wish to use.
- To start a Guided Access session on your iPad, do any of the following:
- First, triple-press the Top button on your iPad. On iPads with a Touch ID, press the Home button thrice.
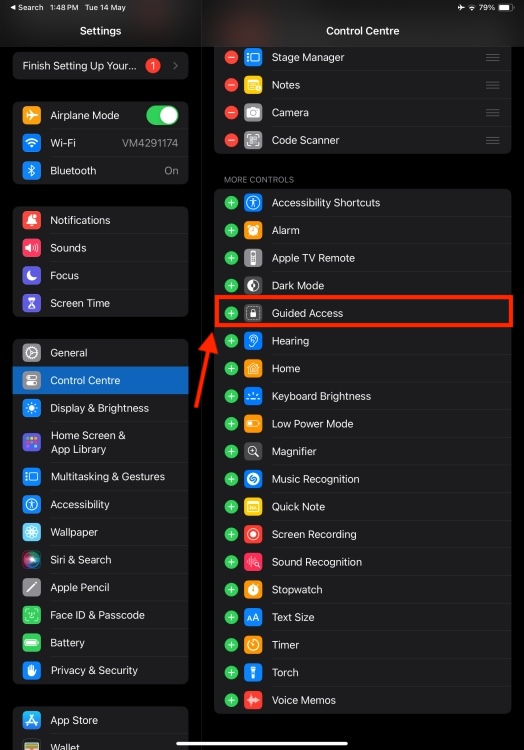
- Second, you can start the Guided Access session from the Control Center. If it’s not available, go to Settings -> Control Center and add Guided Access.
- Third, you can always invoke Siri and say something like “turn on guided access”.
- You can now circle any areas on the screen you wish to disable.
- Finally, tap on Guided Access and hit the Start button.
Options Available Within iPad Guided Access
When starting a Guided session, you can adjust a few options to further restrict your device’s operation. You can disable the following features:
- Top Button: It prevents the user from putting the device to sleep or waking it up.
- Volume Buttons: This will prevent the user from changing the volume.
- Motion: It will prevent the iPad from switching from portrait to landscape and restrict other motion-based gestures like shake/tilt.
- Software Keyboards: This will turn the keyboard off so a user can’t type.
- Touch: When turned off, it will prevent all touch inputs so a user can’t swipe or tap on the screen.
- Time Limit: This allows you to set a time limit for your guided session. Once the time limit is reached, your iPad will display the “Time Expired” screen. To continue using your device, you’ll have to enter the Guided Screen passcode.
How to End Guided Access Session
Once you’re done with the Guided Access session and want to unlock your iPad’s screen, you can choose to end the session. Depending upon the passcode options you’ve chosen while setting up the Guided Access session, you can do any of the following:
- If you’ve set up a Guided Access Passcode: Triple-press the Top button (or Home button in case of iPads with a Touch ID) and then enter the Guided Access passcode. If you haven’t set one, enter your iPad’s passcode.
- If you’ve turned on Face ID or Touch ID for Guided Access: Double-press the Top button (or Home button on iPads with a Touch ID, and then unlock your iPad with Face ID or Touch ID.
- Finally, tap on End to turn off the Guided Access section on your iPad.
Triple-press the Power key or the Home Button (depending on the model) to start Guided Access on your iPhone or iPad.
There’s no official or straightforward way to get out of a Guided Access session without entering the passcode. If the owner has set up a Guided Access Passcode, you have to enter that to exit the Guided Access. Otherwise, the device’s passcode is required to end the session.
You can toggle the Guided Access feature, restart your device, update software, or reset all settings to make Guided Access work on your iPhone or iPad.

